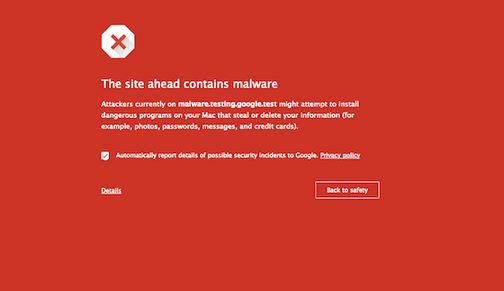
In order to protect web surfers, Google identifies and blacklist dangerous pages. Popular Web Browsers like Google Chrome, Firefox, Safari etc. use Google’s Malware database to warn their users to keep them away from potentially harmful websites. However, it has been found that the majority of blacklisted sites in reality are the legitimate websites into which hackers have inserted some malicious codes.
Google’s Malware Warning is like a nightmare for site owners and blogger because it not only impact their reputation but also their traffic. From last few days, Google was showing a Malware warning for this blog as well. It was strange because i don’t use any nulled product or something like that on this blog. Google Webmaster Tool was also showing a notification related to the insertion of malicious code so I decided to clean the site. After cleaning the site, everything worked flawlessly and Google removed it’s Malware Warning as well. If you are also running a website/blog on WordPress Platform and getting Google’s Malware Warning, you can use below given steps to clean your site and remove Google Malware Warning.
How to Remove Google Malware Warning from WordPress Blogs?
- Step-1 : Scan your Computer
- Step-2: Change your FTP/cPanel Password
- Step-3: Download the Latest WordPress Package
- Step-4: Removing the Malware Infected Files
- Step- 5: Re-uploading the WordPress Files
- Step-6: Change the WordPress Admin Password
- Step-7: Re-Install all Plugins
- Step-8: Go to Google Webmaster Tools and ask for a Review
How to Remove Google Malware Warning from WordPress Blogs?
This step-by-step guide will guide you in removing malware from a WordPress site. However, we recommend you to try below given steps only if you are comfortable with FTP or File Manager. If you are not comfortable with these tools, you can ask us to do everything for you. However, this service is cheap but not free.
Step-1 : Scan your Computer
If your computer is infected with a virus which is leaking your FTP Password, malware can infect your wordPress site. This is actually quite common. So the first thing you should do is to make your computer virus-free. We recommend scanning with with some good anti-malware softwares like Malware Bytes. To keep your windows computer safe, we recommend you to use “Quick Heal Total Security”.
Step-2: Change your FTP/cPanel Password
Now, We assume that your computer is virus free. So you should change your old FTP and cPanel password. Try to use complex passwords. A complex password generally contains at least 1 special character, a mix of lowercase, uppercase and numbers. A good example is “U^#s3dg$@”.
Step-3: Download the Latest WordPress Package
Click the Official Site and Download the Latest WordPress Package. You can download either Zip file or tar.gz file. After downloading, Extract the compressed package you just downloaded.
Step-4: Removing the Malware Infected Files
Login to your FTP or cPanel>>File Manager. If you are using cPanel, navigate to the directory where your WordPress installation files are there. Normally these files should look like this:
It should contain at least below given files/folders:
wp-admin
wp-content
wp-includes
index.php
license.txt
readme.html
wp-activate.php
wp-blog-header.php
wp-comments-post.php
wp-config.php
wp-config-sample.php
wp-cron.php
wp-links-opml.php
wp-load.php
wp-login.php
wp-mail.php
wp-settings.php
wp-signup.php
wp-trackback.php
xmlrpc.php
Delete everything you see there except for the wp-content folder, and the wp-config.php file. After deleting all files except these two, your wordPress Installation directory should show only below given folders/files.
wp-content
wp-config.php
Have a look on wp-config.php file and make sure that there are no strange codes or anything unusual. To know whether some strange codes are there are not, compare the codes with the codes present in file wp-config-sample.php file.
Now move into wp-content folder. It should contain below given files:
plugins
themes
uploads
index.php
Plugins file contains the list of plugins that you use on your WordPress site. Make a note of all plugins. Once done, remove the plugin folder and also the index.php file. After the completion of cleaning process, you will have to re-install all plugins.
Themes folder contains the list of all themes you have uploaded. Remove all themes which you don’t use. Once done, check each files in your current theme folder and make sure that there is no strange codes in any of these files. If you have a backup of your current theme, you can delete the current theme folder and upload the old one.
Have a look on upload directory and make sure that there is no any file which you haven’t uploaded.
Step- 5: Re-uploading the WordPress Files
Now, you should uploaded all the WordPress files(except wp-content) that you extracted in Step-3.
Step-6: Change the WordPress Admin Password
You have cleaned your WordPress site. Now, we recommend you to change your WordPress admin Password.
Step-7: Re-Install all Plugins
During cleaning, you deleted all the Plugins so you will have to re-install them again.
Step-8: Go to Google Webmaster Tools and ask for a Review
Visit Google Webmaster Tools . In Dashboard, click on “Security Issues” option. This page will display the list of infected urls along with “Request a Review” button. Just check the check box which says “I have fixed the issues” and click on “Request a Review” button. That’s it.


 Copyright © 2018 Aeron7 Inc. All rights reserved.